General remarks
Administration
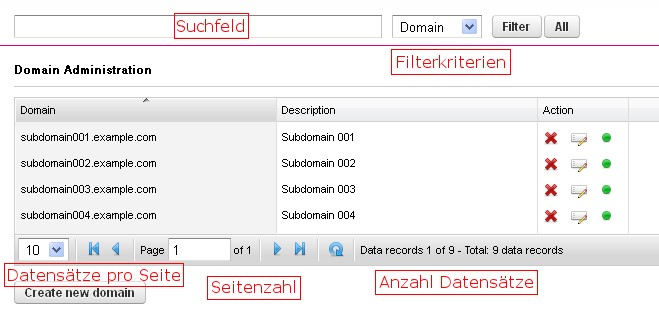
Search field – This is where you enter the term you are looking for or a part of it, and then click on “Filter”.
Filter criteria – Depending on the menu item, there are various criteria that can be used for filtering. Please select the appropriate entry.
Filter – Clicking on this button filters the database according to the term you have entered and the results are displayed accordingly.
All – This button allows you to empty the search field and show all the records again.
In the editing mode of a data record, this returns you to the management (like the “Back to table” button). Any changes will be discarded.
Actions
- Options:
Delete – The row you have selected will be permanently deleted. There will be another confirmation prompt. Once the query has been acknowledged with “OK”, the action can no longer be undone.
Edit – The screen for editing this entry opens, and you can make and save changes or return to the previous view without saving by clicking on the “Back to table” button.
Disable/enable – By clicking on this, the selected database entry can be disabled (button turns red) or re-enabled (button turns green). Please note that this action is implemented without a time delay and the appropriate domain etc. can then no longer be used.
Number of records displayed per page – This is where you set the number of records per page to be displayed on your monitor.
- Options
- 10
- 15
- 20
- 30
- 50
Page number – Displays the total number of pages and the number of the page you are currently viewing.
Number of records – Displays the total number of records.
Create a new domain – This button is used to create new entries.
Edit
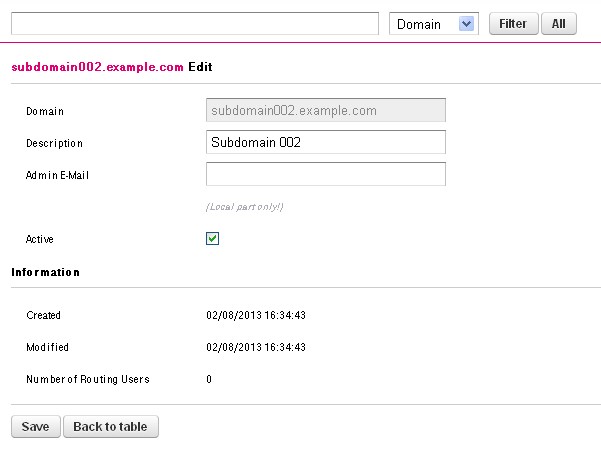
Created
This shows you when the selected entry was created.
Changed
This is the date of the latest change to this entry.
Save
This button saves all changes made up to this point.
Back to table
This button takes you back to the management menu. Any changes will be discarded.